
Installing Let’s Encrypt SSL Certificate with pfSense
Introduction
LetsEncrypt certs are 90 days, and must be renewed. Secondly, you have to be able to prove you control the name that the certificate is for. This makes things more complicated.
There are several ways to verify ownership of a domain.
Firstly is create a TXT-record _acme-challenge of your DNS-name.
It requires manual actions if your DNS provider doesn’t provide an API to create dns records.
This method is only way to get wildcard certificates.
But if we want to use not many domains in the HTTP-server, we should prefer to
use option named as Standalone HTTP server.
Before to continue create DNS-records type A with domains that would be accessible with SSL.
I advice use a staging ACME-servers of LetsEncrypt for test use cases because it will only let you do 5 calls per hour.
Environment
In this article I’ll be showing you how to do this with next version of components:
- pfSense 2.4.4
- acme 0.6.3
Installation
So here’s a little guide on the process to enable signed Let’s Encrypt certs on your pfSense Web interface.
acme package
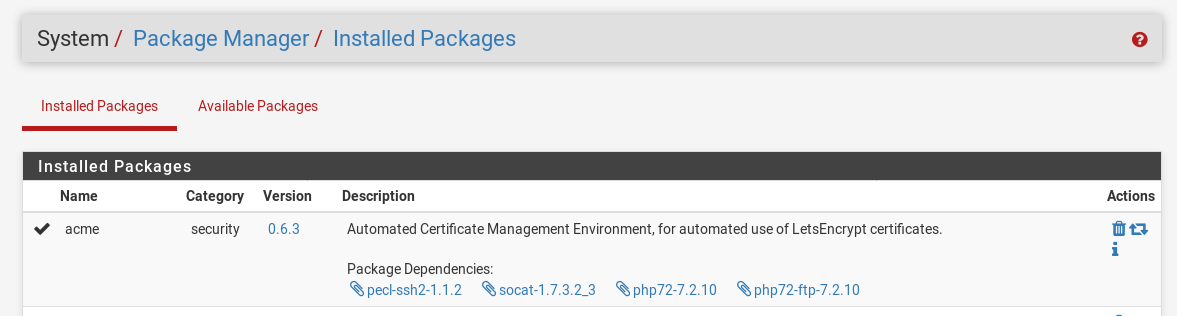
Under System / Package Manager / Available Packages you should find a package called acme.
Click the install button and allow it to complete.
account key
Once installed you should find Acme Certificates under the Services menu.
The first step is to create your account keys. Enter a name, select the production server if you want this to be live.
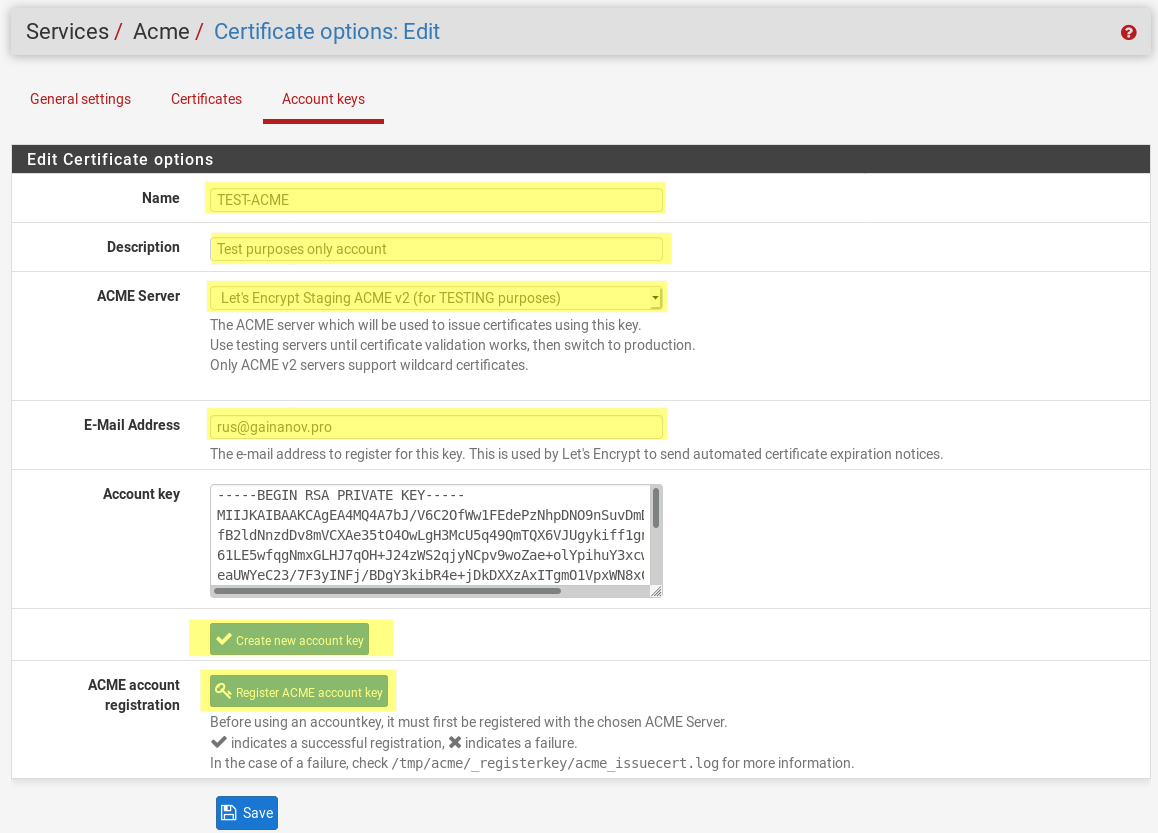
Click Create new account key to generate a key and insert it into the Account key box.
Finally click the Register ACME account key, wait to get successful response, then click Save.
create certificate
The next step is to create your certificate.
Under Certificates click the Add button.
Enter the details such as the name and description. Set to Active, select your acme account, key size 2048 is currently standard.
Set your domain SAN, for example web.example.com, db.example.com, nginx.example.com.
Each domain should be written in a separate row in the table.
The method will be how the Let’s Encrypt server will validate that you control the domain before issuing the cert.
I selected Standalone HTTP server and in the options set the listen port to 8080.
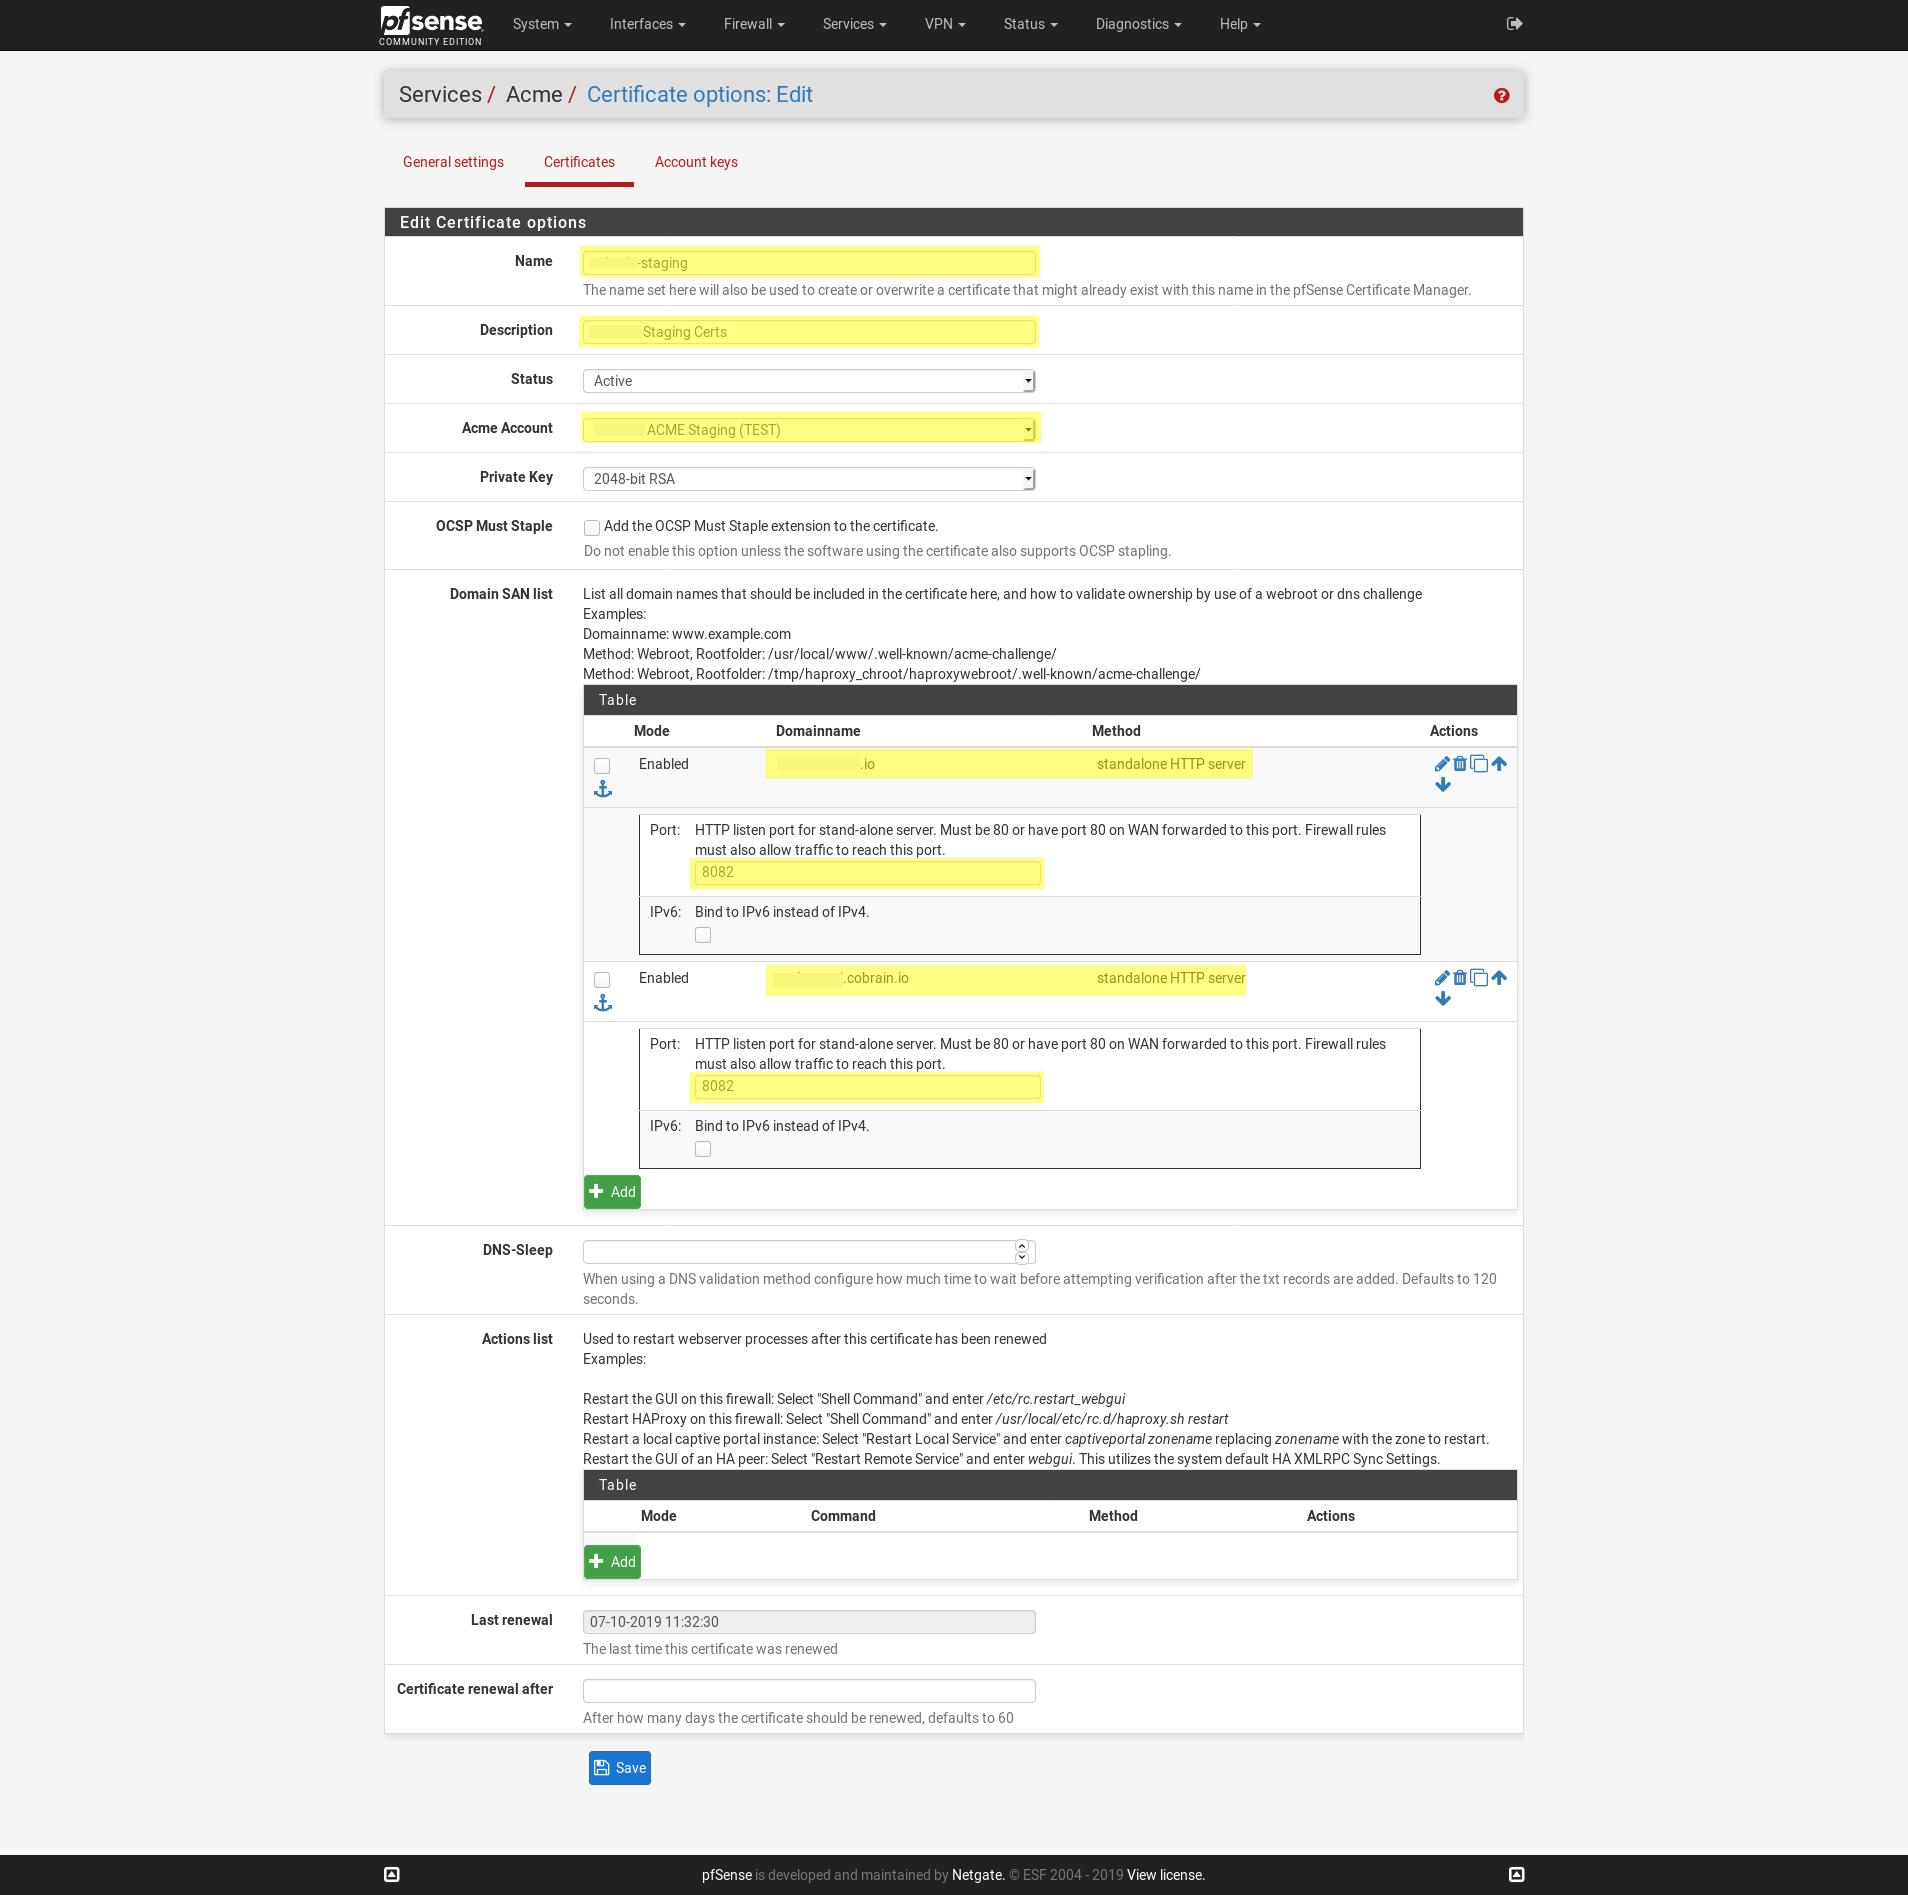
We will accomplish this with a port forward rule in the next step. This is important because the ACME server needs to be able to access this standalone HTTP server on port 80.
forward rule
Under Firewall / NAT / Port Forward create a new rule that forwards port
80 HTTP to port 8080 in your pfSense IP address which is 192.168.100.1 by default.
This allows the ACME server to communicate with your device to verify ownership.
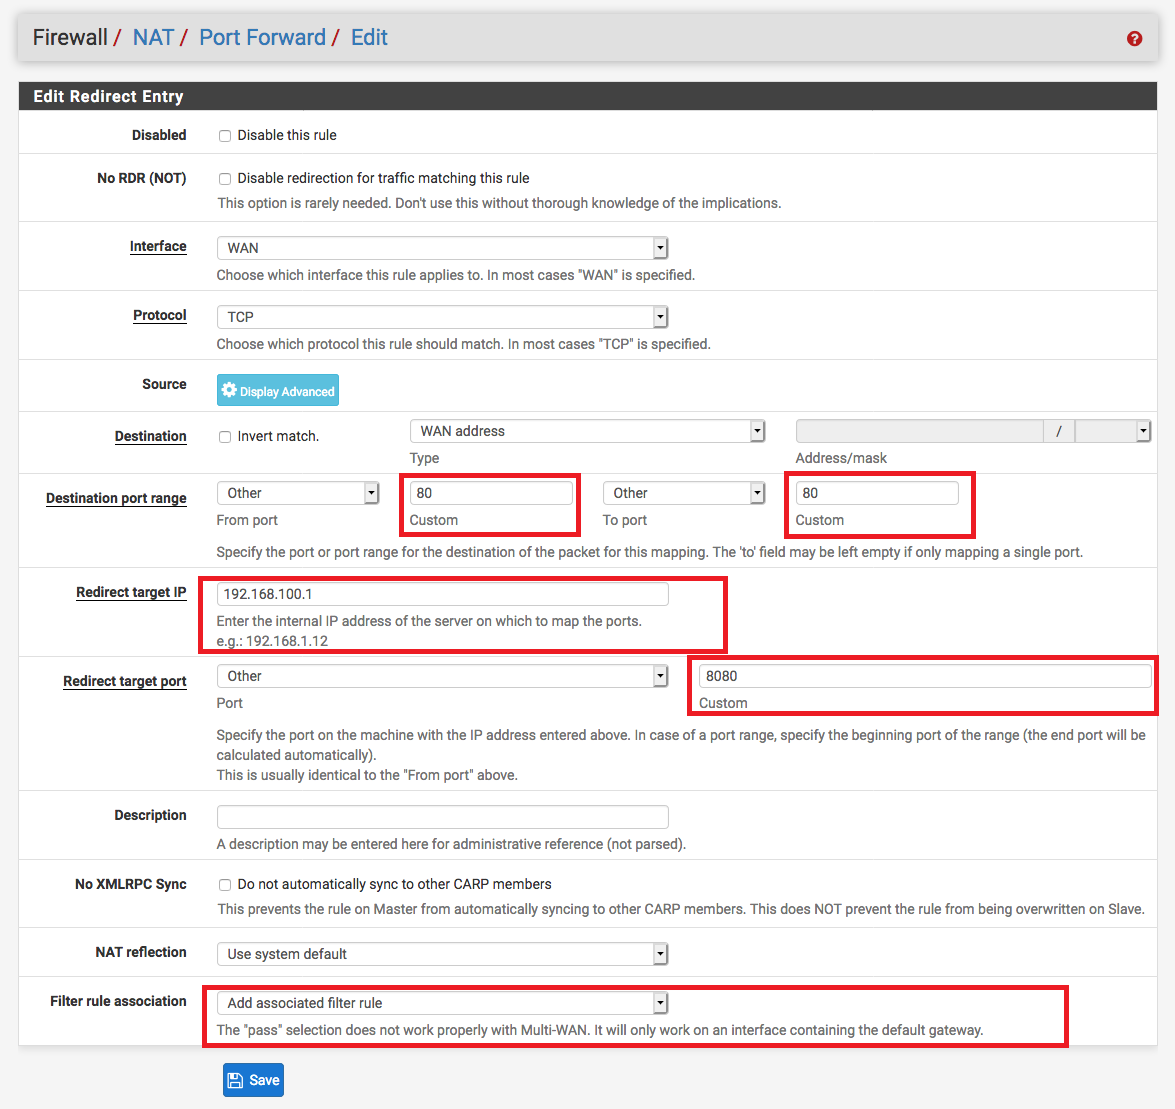
In this picture 8080 port is bound with Standalone HTTP server in the ACME certificates page.
The IP 192.168.100.1 is my pfSense local IP. Don’t forget to set Add associated filter rule in the option Filter rule association.
Open the Firewall / Rules / WAN page and check that the rule was automatically created.

issue certificate
We are ready to request a first certificate. Click an Issue/Renew button under Services / Acme / Certificates on required certificate.
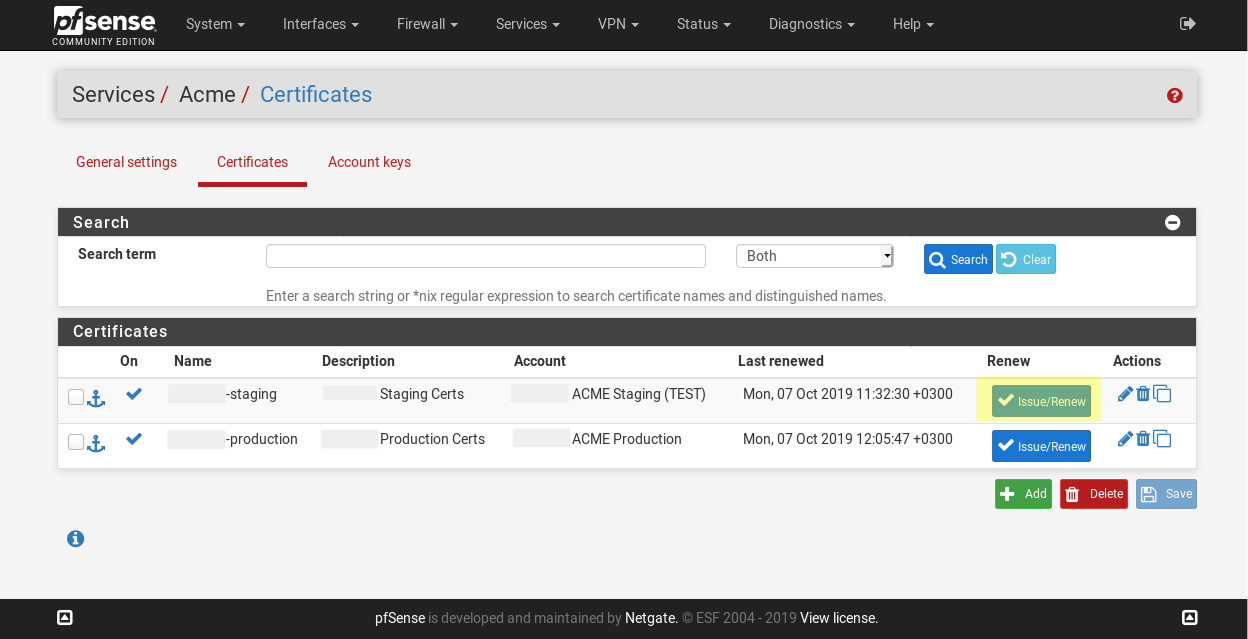
The gear will turn, and after a bit you’ll see a lot of green text. If there is block that looks like:
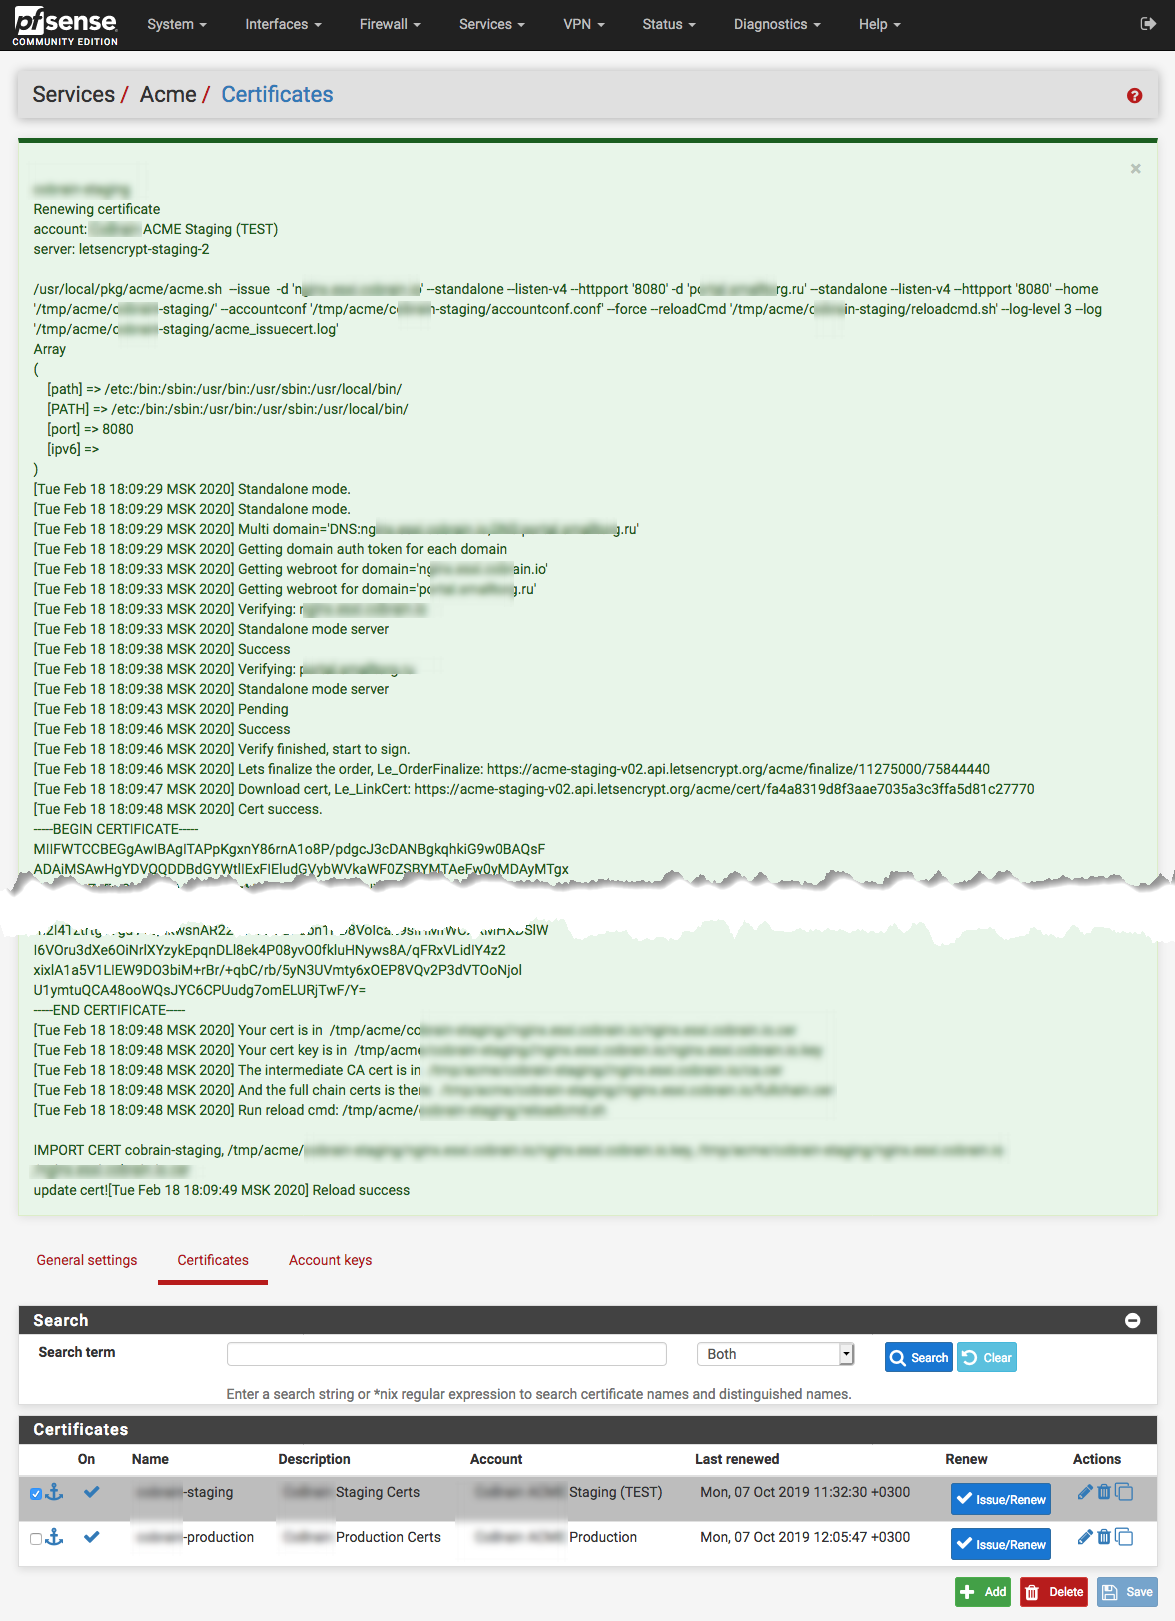
The successful message will include this text in the end:
[Wed Feb 19 10:36:34 MSK 2020] Cert success.
-----BEGIN CERTIFICATE-----
< ... >
-----END CERTIFICATE-----
[Wed Feb 19 10:36:34 MSK 2020] Your cert is in  /tmp/acme/staging//nginx.example.com/nginx.example.com.cer
[Wed Feb 19 10:36:34 MSK 2020] Your cert key is in  /tmp/acme/staging//nginx.example.com/nginx.example.com.key
[Wed Feb 19 10:36:34 MSK 2020] The intermediate CA cert is in  /tmp/acme/staging//nginx.example.com/ca.cer
[Wed Feb 19 10:36:34 MSK 2020] And the full chain certs is there:  /tmp/acme/staging//nginx.example.com/fullchain.cer
[Wed Feb 19 10:36:34 MSK 2020] Run reload cmd: /tmp/acme/staging/reloadcmd.sh

IMPORT CERT cobrain-staging, ... update cert!
[Wed Feb 19 10:36:35 MSK 2020] Reload success
Be sure to read it carefully! Even though it’s green and the top may say success, there could be errors listed that you’ll want to resolve.
disable firewall rules
When have done disable the NAT and Firewall Rules for security reasons. Don’t remove it, it requires for renew certificates.
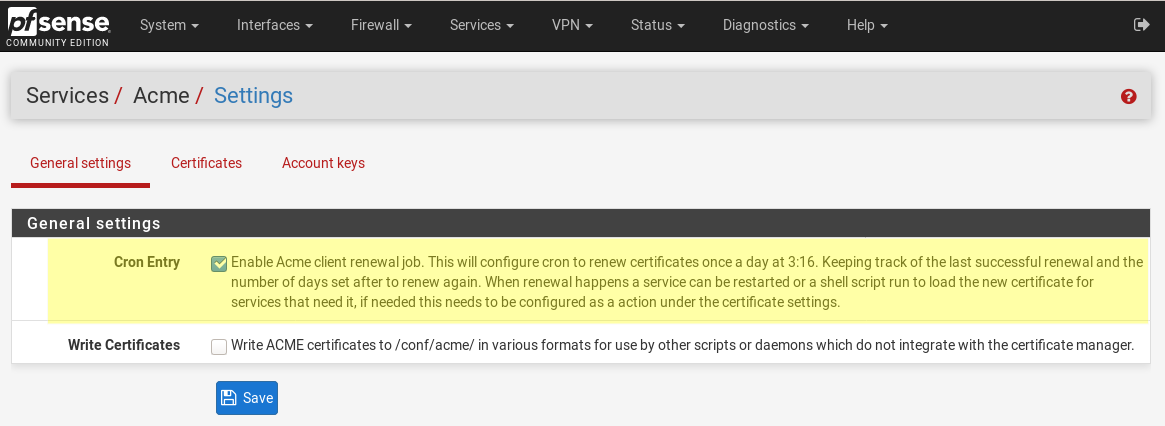
auto renew (optional)
LetsEncrypt certificate as said before lives only 90 days. After that you should renew certificates. You can do it manually (just a click Issue/Renew button) or set up auto update process. For auto renew enable Acme client renewal job under Services / Acme / Settings.
I prefer to manually renew because errors is occurred frequently.
use certificates
Setup certificates to desired hosted or proxy site or webGUI for an access to them by HTTPS SSL.
In next post I will show you how to use LetsEncrypt certificates with HAproxy Package.
Some notes
If you have any issues or questions, you can reach out to me and I’d be happy to help.
Additional information
- Wildcard Certificates on pfSense - Creating Wildcard Certificates on pfSense with Let’s Encrypt.
- LetsEncrypt SSL Certificate with pfSense - LetsEncrypt SSL Certificate with pfSense on Internal Linux Server.
- ACME package - pfSense - Official documentation of ACME on pfSense site.
- Acme plugin on pfSense - Acme plugin on pfSense, add Let’s Encrypt Cert to your firewall.